How to Know When You’ve Polished a Piece of Music and Are Ready to Move On?
by Beth Blackerby
Throughout my entire violin education (1968–1993), the decision about what pieces of music to play and how long to work on them was entirely dictated by my private teachers. They determined the path, and I followed their lead without question.
This traditional, teacher-guided approach provided a clear structure, ensuring that each piece was thoroughly learned before progressing to the next. However, for many adult learners today, that structured guidance is no longer built into their learning experience.
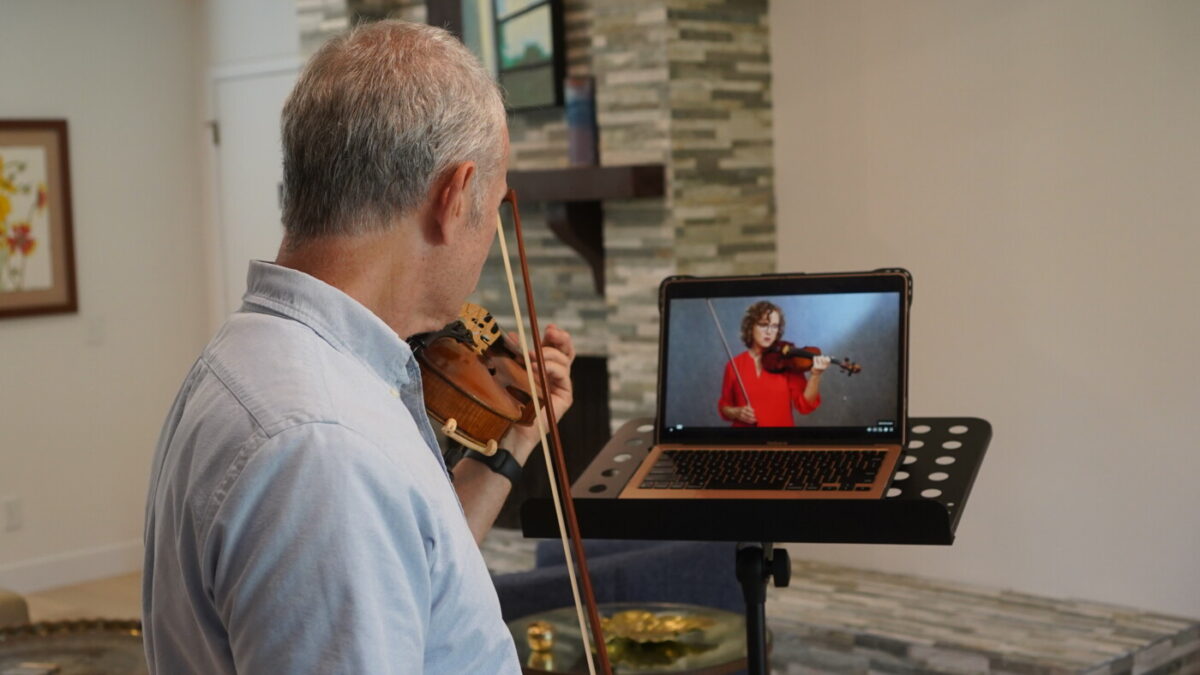
With the rise of online violin learning, many adults now navigate their violin journey independently. This shift has brought both freedom and challenges. One of the biggest hurdles for members of Violin Lab—and self-directed learners in general—is knowing when they’ve achieved enough mastery to move on to new repertoire.
Without the external validation that traditional instruction provides, many adult learners feel uncertain knowing whether or not they have reached adequate levels of competency with the music they practice. They often ask themselves: “Am I ready to move on?” or “Am I rushing through repertoire without truly mastering it?” This uncertainty can lead to frustration or even a plateau in progress.
To help address this common challenge, I’ve created a simple rubric that allows students to objectively evaluate progress while working on a piece of music. Following these guidelines will help any student decide with confidence when it’s time to move forward.
It will also be helpful in setting clear goals and creating effective practice plans. It’s a practical and empowering approach to making your practice sessions more purposeful and productive.
How to use the Self- Assessment Rubric
The self-assessment Violin Lab rubric covers eight key areas of violin performance, each divided into four stages of learning a piece of music, from first exposure to polished mastery. The estimated time periods below assume the player practices efficiently, with deep focus and effective practice strategies.
- Stage 1: Initial Exposure
This is the introductory phase of learning a piece, where the focus is on learning notes, rhythms, and basic techniques. - Stage 2: Early Development
After 20+ hours of practice, fewer mistakes are made with notes and rhythms, and the student begins to feel some confidence playing the piece. - Stage 3: Substantial Practice
With 50+ hours of dedicated practice, typically over two to three months, the piece begins to take shape with improved fluency and musical expression. Mistakes are rare, but there is yet polishing to be done. - Polished Performance
With 100+ hours, typically 6 months or longer, deep learning has solidified the player’s understanding and execution. The piece is played with confidence, emotional nuance, and technical precision.
Read through the list below and familiarize yourself with each of the performance parameters.
1. Intonation
Achieving good intonation is arguably the most essential aspect of truly learning a piece of music. Even if you produce the sweetest tone, if the notes aren’t in tune, the performance will be difficult to enjoy. Imagine a singer with a beautiful voice but who struggles with pitch—while you might appreciate the tone of their voice, out of tune notes would nevertheless make it unlistenable.
Are You Playing In Tune?
- Stage 1: You often play notes out of tune, and even play incorrect ones, like an F# instead of an F natural.
- Stage 2: You don’t play incorrect pitches outright, but many are habitually out of tune, like high 3rd fingers that are consistently not “high enough”.
- Stage 3: No wrong notes; intonation is generally good, with occasional lapses.
- Polished Performance: Intonation is predominantly Spot-on. You will never be 100% perfect, but there should be no significant intonation issues that stick out and distract from the flow of the music.
Watch a video on Tips for Improving Intonation
2. Rhythm
Most rhythmic errors stem from a lack of attentiveness. If you can tap your foot to the beat of music, you already have the ability to play with good rhythm. Achieving consistent rhythm, however, requires a proactive approach. Techniques like vocalizing your part while using a metronome can help you internalize and fully understand the rhythms in your music.
Are You Keeping Accurate Time?
- Stage 1: Frequent rhythmic errors and confusion; notes often not held for their full value.
- Stage 2: Basic rhythms are correct, but might have a minor mistake and often has trouble holding notes for their full value. Rhythmic figures are often unsteady.
- Stage 3: Rhythms are accurate, and notes are mostly held for their correct lengths. Some unsteadiness like “rushing” or “dragging”.
- Polished Performance: Rhythmic execution is flawless.
Pro Tip: Practice with a metronome to internalize the correct rhythm and timing.
3. Consistent Tempo
Tempo has to do with keep your beat steady. Of course, playing music will and never should be robotic. The flow of beats in music will expand or contract with phrasing. However students often speed up and slow down randomly, usually showing that they bog down when things get tough or rush through when notes are easy.
Can You Maintain a Consistent Speed?
- Stage 1: Tempos are often erratic and fluctuate significantly, slowing down during difficult passages and rushing when notes are easy.
- Stage 2: Tempo is consistent in easier sections, but often bog down in difficult sections. General tempo is about 70% of performance tempo.
- Stage 3: Can play at 80-90% of performance tempo consistently without slowing down in difficult sections.
- Polished Performance: Plays all sections of the music with ease at performance tempo.
4. Bow Markings and Articulations
Even a nano second of confusion with bowing and bow markings will disrupt the flow of music. At best it can be a momentary stumble and at worst, you have to stop and restart. Teaching yourself the bow arm’s responsibility, independent of the left hand is a powerful practice technique.
Are you consistently on the “correct bow”?
- Stage 1: Changes bow direction accidentally when hesitates. Starts a phrase on the wrong bow. Gets confused with slurs. Does not pay attention to articulation markings like staccato or legato marks.
- Stage 2: Uses correct bowing but doesn’t budget or save bow on long notes. Will get stuck in the wrong part of the bow. Paying attention to articulation margins is sporadic and inconsistent.
- Stage 3: Uses the correct bow markings and generally has good bow distribution, but isn’t maximizing using all of the bow for maximum sounds and beauty. Doesn’t consistently move all the way to the frog when should. Pays attention to articulation, but not always crisp and clear.
- Polished Performance: Masters the bowing and maximizes the use of the bow. Has great bow control and clarity of articulation.
Here’s a great tip to train the bow arm!
5. Tone: Beauty and Clarity
Students often focus only on the singing quality of tone, and are often unaware of how clean the start of notes are. The beginning and end of notes are as important as the middle.
Cleanliness: Is Your Playing Precise and Clear?
- Stage 1: Does not combing ideal bow pressure, speed, and sounding point resulting in frequent scratches, muddy articulations, abrupt string crossings, and weak tone quality.
- Stage 2: Issues in stage 1 occur occasionally, but are isolated events.
- Stage 3: Mishaps are rare, and the piece is mostly clean and well-executed, however occasional “messy” spots might occur.
- Polished Performance: Flawless execution with control over all technical elements creating clear, projected tone.
Check out this tip for producing a cleaner tone.
6. Fluency
Hesitations and bobbles are an obvious sign that a student does not know their music well. Most of the time these hesitations are a result of not having learned and studied the music enough. Even well practiced music have sections that can lead to black holes.
Fluency: Does Your Playing Flow Smoothly?
- Stage 1: Frequent hesitations and disruptions due to confusion with reading music, including deciphering notes, rhythms, fingerings and bowings.
- Stage 2: Some hesitations, but there is an established sense of flow.
- Stage 3: Very few hesitations; some sections may be memorized.
- Polished Performance: The flow of the music is natural and playing for memory is reliable.
Practice Hyper-focus to Create Playing Continuity
7. Expression and Style
Dynamics is the delivery system to bring your interpretation of your music to your listener. I often think “How would a great actor deliver this phrase”? “How can I inflect each note to convey meaning?” Many students feel they can’t add expressive detail until they’ve mastered the notes, but expression IS technique. Dynamics inform every aspect of technique, so it is important to bake it into your practice from the beginning.
Expression: Are You Bringing the Music to Life?
- Stage 1: No dynamic contrast or phrasing.
- Stage 2: Basic dynamic changes (e.g., loud vs. soft), but transitions are abrupt.
- Stage 3: Dynamic contrast and phrasing are present; phrases taper naturally.
- Polished Performance: Artistry shines through with clear musical intent and nuanced phrasing.
Check out this video on Contouring the Musical Phrase
8. Mental State
For me, the best antidote to performance anxiety is over-preparation. It’s quite simple. When I have thoroughly learned a piece of music, I feel more confident when playing it. Just as fear and doubt put tension in the body, confidence creates comfort and relaxation.
Mental State: How Do You Feel While Playing?
- Stage 1: Feelings of frustration and lacking confidence.
- Stage 2: Some confidence, but focus is on technical challenges.
- Stage 3: Generally confident, alternating between enjoyment and slight nervousness.
- Polished Performance: Fully confident, relaxed, and enjoying the music.
Watch this video on bringing “Intentionality” into your practice.
Self-Assessment
First, Record Yourself!
Many years ago, when Hillary Hahn was in Austin for a performance with the Austin Symphony, I asked her how she structured her practice time. She said she practiced as much as 10 hours a day, but that included listening to recordings of herself, to assess and direct her practice. I’m always amazed when I listen back to my recorded practice at how much more I notice about my performance level, from intonation to musicality, than when I’m engaged in the act of playing the violin. As I listen, I make notes, which then helps me set goals for the next day.
Download this Rubric to use as a Guide for listening to yourself.
The following tips I have found to get the best results with self-recording.
Tip #1 Record yourself while in performance mode.
Play through your piece without stopping, giving your full attention. Imagine you are performing for an audience.
Tip #2 Wait 2 full days before listening back!
This is important. If you listen to your recording immediately after, you will listen for confirmation of the thoughts you had while recording. You will catch loads more detail, for better or worse if you put some time between recording and reviewing.
Tip #3 Listen to your recording 8 times.
With each playback, focus on each performance parameter listed in this blog, (Be sure and download the chart). Circle which stage best describes your current level of performance.
Tip #4 Re-record
First, spend time improving the qualities you noticed needed work. Maybe a few more hours will take care of small details. Or perhaps, another 20 hours is needed. Then re-record. The process of recording and evaluating is a mighty tool for making progress, and one that great players take advantage of.
Learning to evaluate your own playing is one of the most empowering skills you can develop as a self-directed musician. That’s what this rubric gives you — not just a checklist, but a way of listening to yourself with the same honest, caring attention a great teacher would bring. You’ve put in the hours. Trust what you hear.


It would be good if we were able to add this page to our favorites (to be able to easily access it later on). I didn’t find a way to do that.